
Proper Exercise Technique - Why Form Beats Weight
Proper exercise technique decides whether training builds results or injuries. The most common squat, deadlift, press and row mistakes - and how to fix them.
Why Is Proper Exercise Technique More Important Than Weight?
Proper exercise technique matters more than the weight on the bar because it decides which muscle actually does the work, how your joints and spine are loaded, and whether your progress can last for years instead of a few months. The number on the bar is just a number - technique is what turns that number into strength and muscle, or into pain and injury. Across more than 200 personalised sessions and years of working with professional athletes, I have learned one rule that applies to everyone: movement first, load second. When your technique is clean, every set goes into the right muscle. When it is not, your joints, tendons and lower back absorb part of the work, and sooner or later the body sends the bill.
Below I walk through the most common mistakes in the four fundamental lifts - the squat, the deadlift, the bench press and the row - and show how to fix them, when it is smart to reduce the weight, and what technique correction looks like when you do it with a coach.
The Most Common Squat Mistakes and How to Fix Them
The squat is the best test of whole-body control, which is exactly why it exposes the most mistakes. These are the four I see in the gym almost every day:
- Knees caving inward. It usually happens when standing up out of the bottom position and irritates the knee over time. The fix: lighter weight, consciously spreading the floor with your feet, and strengthening the glutes with exercises like banded lateral walks.
- Heels lifting off the floor. A sign of limited ankle mobility. A small plate under the heels is a temporary fix; long term, work on calf and ankle mobility.
- Lower back rounding at the bottom. If the pelvis tucks under at the bottom of the squat, reduce the depth to what you can control, strengthen your core, and build depth gradually.
- Half squats with too much weight. Depth gets sacrificed for the number on the bar. Half the range means half the effect - 60 kg to full depth beats 100 kg to halfway.
What a Correct Squat Looks Like
Feet shoulder-width or slightly wider, the whole foot on the floor, knees tracking over the toes, torso braced as if you were expecting a light punch to the stomach. The descent takes a controlled two to three seconds, with no bouncing at the bottom. If you cannot do that with a barbell, go back to the goblet squat with a dumbbell - the regression most of my new clients start with.
Deadlift: The Mistakes That Cost the Most
The deadlift rewards the patient and punishes the impatient. These are the errors that most often lead to trouble:
- A rounded lower back. The most dangerous mistake in the gym. The spine must stay neutral through the whole lift; if your back rounds the moment you grab the bar, the weight is too heavy or your starting position is wrong.
- The bar drifting away from the body. Every centimetre of distance from your shins multiplies the load on your lower back. The bar should slide along your legs the entire way.
- Jerking the bar off the floor. The lift starts with the legs, not the arms - imagine pushing the floor away from you. Before you pull, take the slack out of the bar until you feel tension through your whole body.
- Overextending backwards at the top. The finish is a tall stance with squeezed glutes, not leaning back past vertical.
How to Fix It
The two regressions I use most: the Romanian deadlift with moderate weight, because it teaches a proper hip hinge, and pulling from blocks, because it shortens the range until the technique is stable. Only when the movement is clean for 8-10 reps does the weight go up.
Bench Press: Small Details That Decide Everything
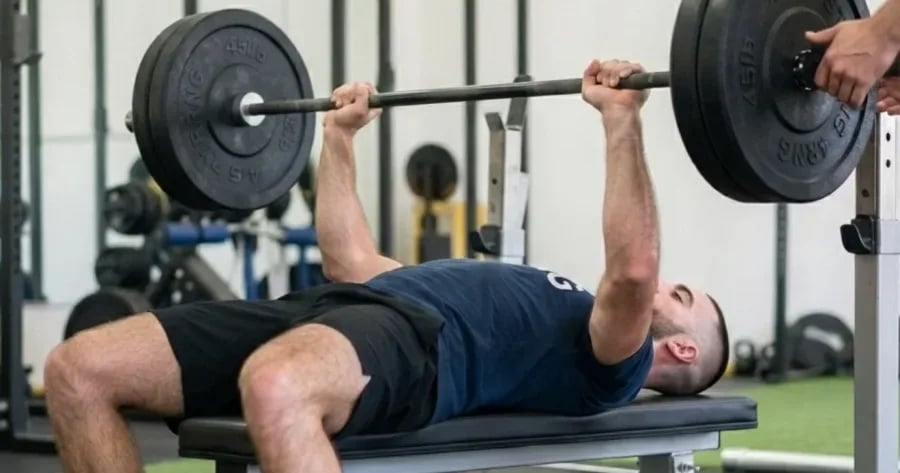
The bench press looks simple, yet shoulders get hurt here more than anywhere else. What to watch for:
- Elbows flared out at 90 degrees. That position puts the shoulder in the worst possible place. The elbows should sit at roughly 45 to 70 degrees relative to the torso.
- Bouncing the bar off the chest. A brief touch without a bounce; the descent is controlled, not a free fall.
- Unstable shoulder blades. Before the first set, pull your shoulders back and down and lock the shoulder blades into the bench - that is your pressing base.
- Restless feet. Feet planted firmly on the floor stabilise the whole body; if they are moving, you are leaking strength before the bar even moves.
The same principles apply to the dumbbell press and the overhead press: a stable base, a controlled descent, a full range of motion.
The Row: The Exercise We Get Wrong Most Often
The bent-over row builds the back that keeps your spine healthy - but only if the back is doing the work rather than momentum. The three most common mistakes:
- Heaving with the torso. If your torso rises and falls with every rep, the weight is too heavy. The torso stays still; the arm and shoulder blade do the work.
- Pulling with the arms instead of the back. The movement starts at the shoulder blade: retract it first, then bend the elbow. Imagine pulling your elbow towards your back pocket.
- A shortened range of motion. Full stretch at the bottom, a full squeeze of the shoulder blades at the top, with a brief one-second pause.
With the athletes I coach through athletic conditioning, a quality row is one of the first movements we establish, because a strong, stable back carries everything else.
Ego Lifting: How Bad Technique Stalls Your Progress
Ego lifting means loading a weight your technique cannot support - and it is the most common reason people train for years without visible results. The mechanism is simple: when the weight is too heavy, the body steals the movement from stronger muscle groups and joints, the target muscle works less, and the injury risk climbs. Progress stalls because you cannot progressively overload a movement you do not control. Research consistently shows that controlled execution through a full range of motion produces better gains in muscle and strength than heavier loads with poor form. In practice that means the person who lifts less but clean for six months almost always overtakes the one who lifts more but ugly - and does it without breaks for shoulder, knee or back pain.
What Technique Correction With a Coach Looks Like
Technique correction is not just stand up straight and brace your core. It is a systematic process that in my work looks like this:
1. Movement Assessment
In the first session I watch how you move with no load and with light load: the squat, the hip hinge, shoulder and ankle mobility, core stability. That immediately shows where the movement leaks and what limits it - mobility, stability or habit.
2. Regressions and Progressions
Every problem exercise has an easier version that teaches the same pattern: the goblet squat before the barbell squat, the Romanian deadlift before the conventional pull, the chest-supported row before the bent-over row. Once the regression is stable, we return to the main lift - usually within two to four weeks.
3. Video Analysis
We film your working sets from the right angle and review them together in slow motion. People often believe they are doing one thing while the footage shows another - and that moment of recognition changes technique faster than anything else. I work this way both in person in Sarajevo and online, because technique responds very well to remote coaching when there is a clear system behind it. You can see more about how I work on my page.
When Should You Reduce the Weight?
Reduce the weight immediately if you notice any of the following:
- your last reps look significantly different from your first;
- you feel the exercise in the joint rather than the muscle;
- you have to jerk, arch or wriggle to finish a rep;
- your range of motion shrinks from set to set;
- after training, a joint or your lower back hurts instead of the muscle.
The rule I give my clients: drop the weight by 10 to 20 percent and work your sets to one or two reps short of failure with clean technique. The strength comes back quickly - this time on healthy foundations.
How to Check the Basics on Your Own
You cannot watch your own back while you lift, but you can do the following:
- Film yourself with your phone from the side and diagonally from the front during working sets, then compare the footage with good examples of the lift.
- The tempo test: lower for three seconds and pause for one second at the hardest point. If your technique collapses there, the weight is too heavy.
- Check your symmetry: does the bar stay level, and does one side of your body move faster than the other?
- Track where you feel the exercise: squats in the thighs and glutes, rows in the back, presses in the chest and triceps - not in the knee, the shoulder or the lower back.
Self-checking catches the big errors, but the details - angles, timing, breathing, set-up - are solved fastest by an experienced eye from the outside. One or two technique correction sessions often change more than months of training on autopilot.
Training delivers the best results when the plan is built for you - your goal, your schedule and your current level. I bring years of work with professional athletes and hundreds of EMS and personal training sessions, and today I coach clients in person in Sarajevo and online. If you want a plan tailored to you, see how I work and get in touch.
FAQ
- Is it better to lift heavier or to train with proper technique?
- Proper technique always comes first. A weight you cannot control shifts the work from the target muscle to your joints and lower back, which stalls progress and raises injury risk. Earn a clean movement through a full range of motion first, then increase the load gradually.
- How do I know if my squat form is correct?
- Film yourself from the side: the whole foot must stay on the floor, the knees track over the toes, and the lower back stays neutral to the bottom. If your heels lift or your pelvis tucks under, reduce the depth or the weight and work on ankle mobility.
- What is ego lifting and why is it a problem?
- Ego lifting means loading a weight your technique cannot support, usually for the sake of the number on the bar. The result is less work for the target muscle, more stress on the joints and more frequent injuries - slower progress despite the heavier weight.
- How long does technique correction with a coach take?
- The big errors are usually fixed within one or two sessions using a movement assessment and video analysis. Building stable, automatic technique on the main lifts typically takes two to four weeks of regressions and a gradual return to your working weights.